In this tutorial, you will learn how to print labels from Excel.
A Microsoft Word mail merge can be used to send a bulk mailing to an address list that you have in an Excel spreadsheet. Each mailing label on the sheet that results from the mail merge procedure has one address from the list, and you can print the sheet.
Once ready, we’ll get started by utilizing real-world examples to show you how to print labels from Excel.
Table of Contents
Print Labels from Excel
You can easily print labels from Excel.
Step 1
First, you need an existing data group to form the labels in Microsoft Word.

Step 2
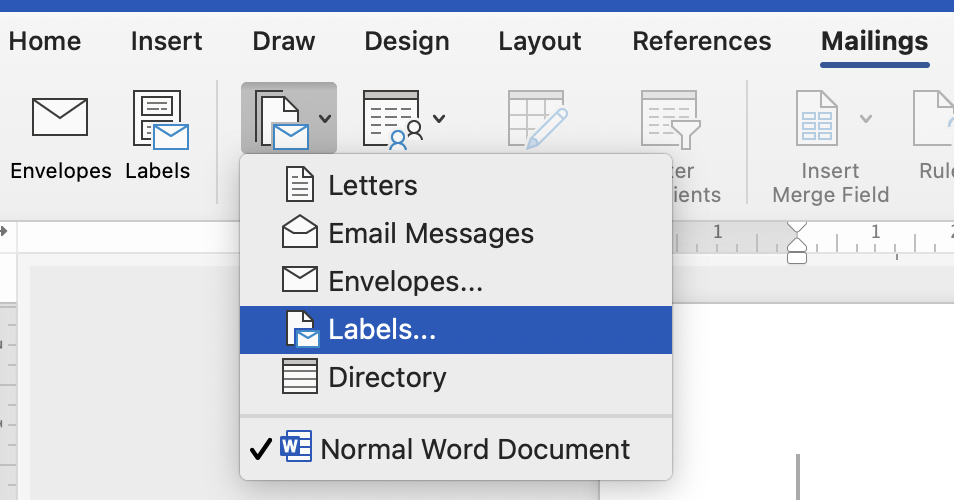
Then, open a Word document. Then select ‘Mailings’ and select ‘Labels’.
Step 3
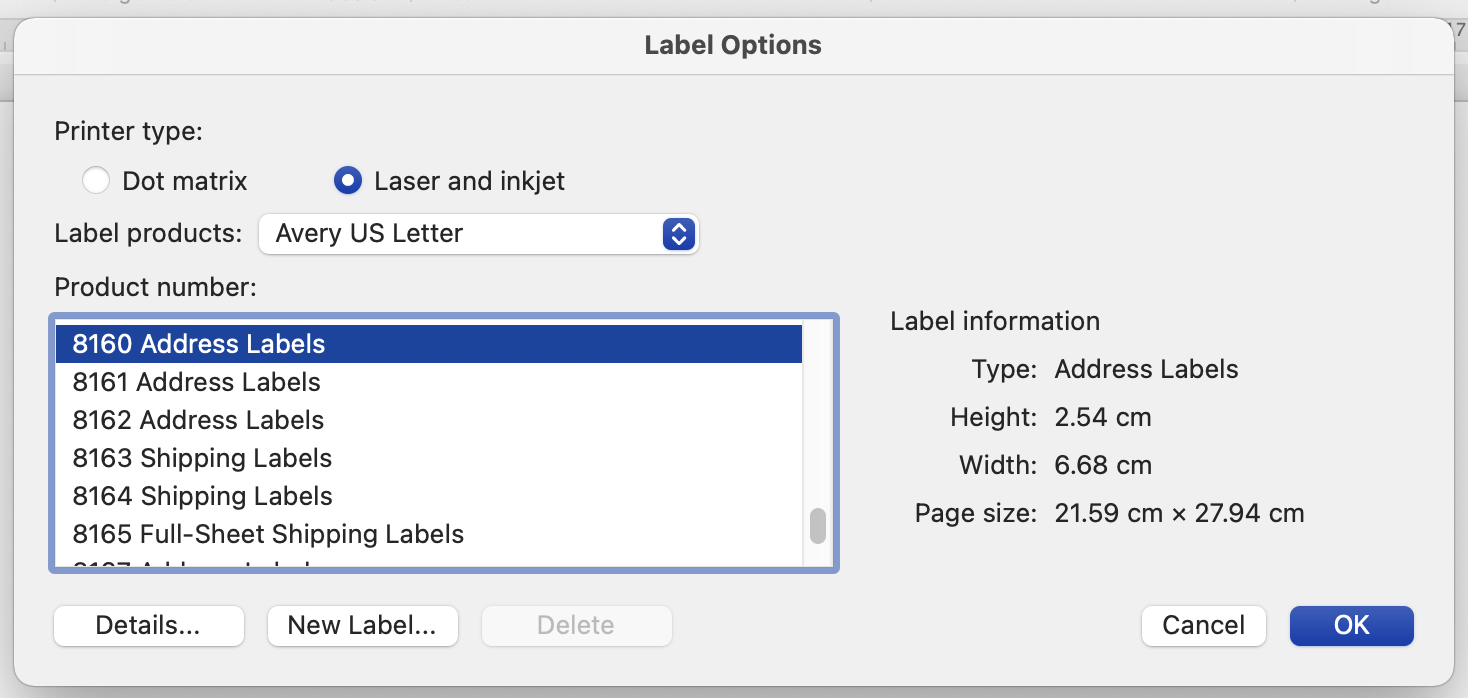
A pop-up box will then appear, make sure to select the options as shown below to create the labels.
Step 4
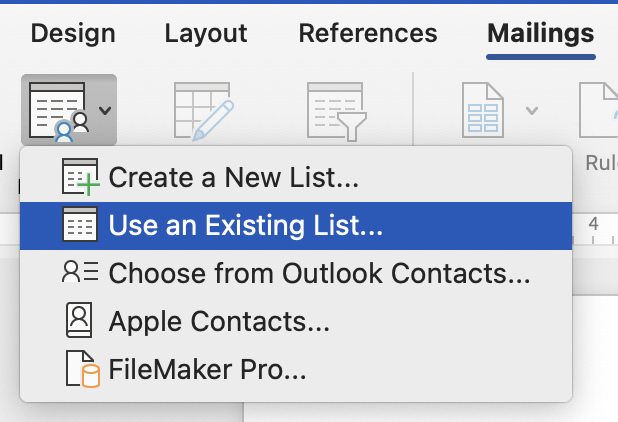
Then we will insert the existing address list from Excel to the Word document to create the labels. To do so, select ‘Mailings’ then select ‘Use an Existing List’. You then select your saved Excel file.
Step 5
Now your labels will appear like this.

Step 6
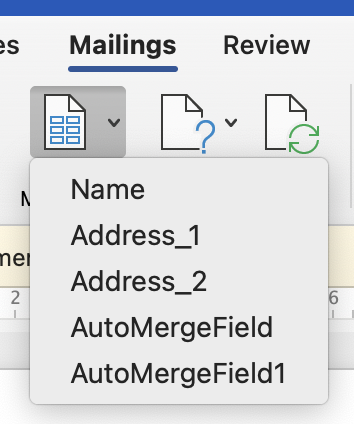
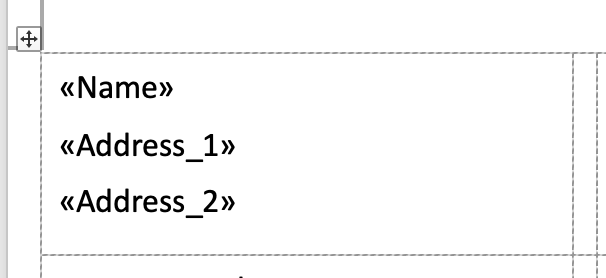
Now we will include the merge fields into the Word document.
Step 7
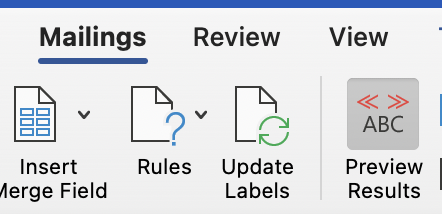
We then select ‘Update Labels’ to update all the labels to include all of the address. Then we select ‘Preview Results’ to see the final label.
Step 8
Once you are done, your labels will look like this.

Summary
That’s all there is to it. You are welcome to copy the example spreadsheet below to see how it is done. The most crucial lesson is to enjoy yourself while doing it.
In this tutorial, I covered how to print labels from Excel.
